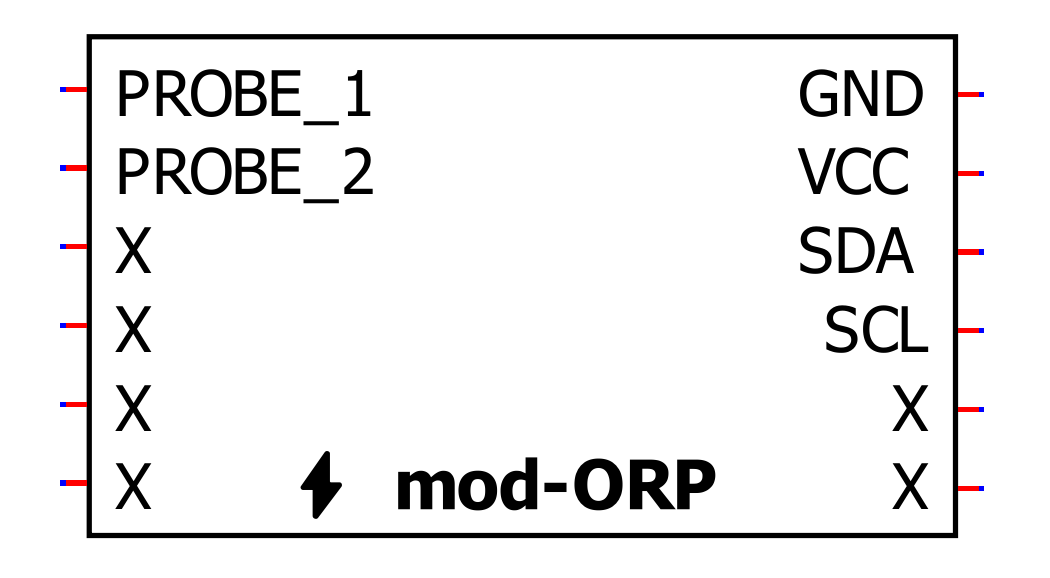
mod-ORP
Datasheet
ORP is oftentimes not calibrated.
Procedure
Following good lab procedures is important to obtain the best results while also staying safe. ORP measurements typically involve calibration solutions which are generally all toxic or hazardous to some extent. Aside from safety considerations, the following is a step-by-step process calibration:
- Collect all the materials needed: calibration solutions, clean water, towels, equipment, etc.
- Rinse the probe in clean water. RO/DI, deionized, or distilled water is best. Tap off excess water drops trapped in the probe tip and blot dry.
- Pour some calibration solution into a separate container. It should be enough to fully submerge the tip of the probe, then submerge the probe.
- Continually take measurements, watching for the measurement to stabilize. When the reading stabilizes, have the module calibrate itself for the solution.
- Safely dispose of the calibration solution and clean or dispose of the container. It is important to note that ORP solutions change slightly with temperature. The solution may provide temperature-compensated values. In this case, the solution should be brought to one of those temperatures and that value used.
Calibration Types
The module supports one method of calibration.
Single Point
ORP is calibrated using a single point.
1.
🔽 Install Arduino IDE
Install the Arduino IDE
2.
📦 Install the library
Start the Arduino IDE, press the Sketch menu, and then Include Library > Manage Libraries. Search for Microfire_Mod-ORP and install the library.
3.
🔢 Code
Below is the Basic example. It can be found in File > Examples > Microfire_Mod-ORP > Basic in the Arduino IDE.
#include <Microfire_Mod-ORP.h>
Microfire::Mod_ORP::i2c orp;

void setup() {
	Serial.begin(9600);
	Wire.begin();
	orp.begin();
}
void loop() {
	orp.measureORP();
	Serial.println((String) orp.mV + " mV");
	Serial.println();
	delay(1000);
}
4.
➡️ Upload the code
Pick the board and port, then Upload the code.
5.
🔎 View the output
Open the Serial Monitor, measurements should be displayed in the monitor, with updates every second.
6.
Documentation
The library is documented here:
1.
📦 Install ESPHome
Follow the instructions on the ESPHome website.
2.
⌨️ Start a project
Type esphome wizard mod-orp.yaml in the terminal. Make sure the path on the terminal is where you want the project to be. Follow the steps, and there should be a .yaml file in the directory you ran the command in. For this write-up, it will be mod-orp.yaml. If you type esphome compile mod-orp.yaml you should see the project compile.
3.
🔢 Code
The YAML file should be changed to the following:
esphome:
  name: microfire-mod-orp
esp32:
  board: esp32dev
  framework:
    type: arduino
logger:
api:
ota:
wifi:
  ssid: !secret wifi_ssid
  password: !secret wifi_password
  ap:
    ssid: microfire-mod-orp
    password: !secret wifi_failover
captive_portal:

# import the mod-orp component
external_components:
  - source:
      type: git
      url: https://github.com/u-fire/ESPHomeComponents/

# https://esphome.io/components/i2c.html
i2c:
  sda: 21
  scl: 22

sensor:
  - platform: mod_orp
    id: orp
    name: ORP

button:
  - platform: template
    id: orp_calibrate_low
    name: ORP Calibrate Single 400 mV
    icon: mdi:format-vertical-align-center
    on_press:
        lambda: |-
          id(orp).calibrateSingle(400);

  - platform: template
    id: orp_calibrate_reset
    name: ORP Calibrate Reset
    icon: mdi:restore
    on_press:
        lambda: |-
          id(orp).calibrateReset();
  - platform: factory_reset
    name: Restart with Factory Default Settings
This example uses the esp32dev board, make sure to change it as needed. Change the wifi section to your network and password. Check that the i2c section is using the correct pins.
4.
➡️ Upload
Type esphome run mod-orp.yaml. It will compile the project and ask you which serial device to upload the code to. After that, you’ll see the ESP debug output. If everything goes to plan, you should see a device has been discovered in Home Assistant.
5.
🏠 Home Assistant
From within Home Assistant, press Settings > Devices & Services and find the device in the ESPHome integration box. Click it and then click where it says 1 Device. You should see a screen with all the information, conductivity measurement, and some buttons to calibrate and reset the device. You can create dashboards, scripts, and anything else Home Assistant can do from here.
There are more examples for various combinations of sensors/modules on our ESPHomeComponents GitHub repo.
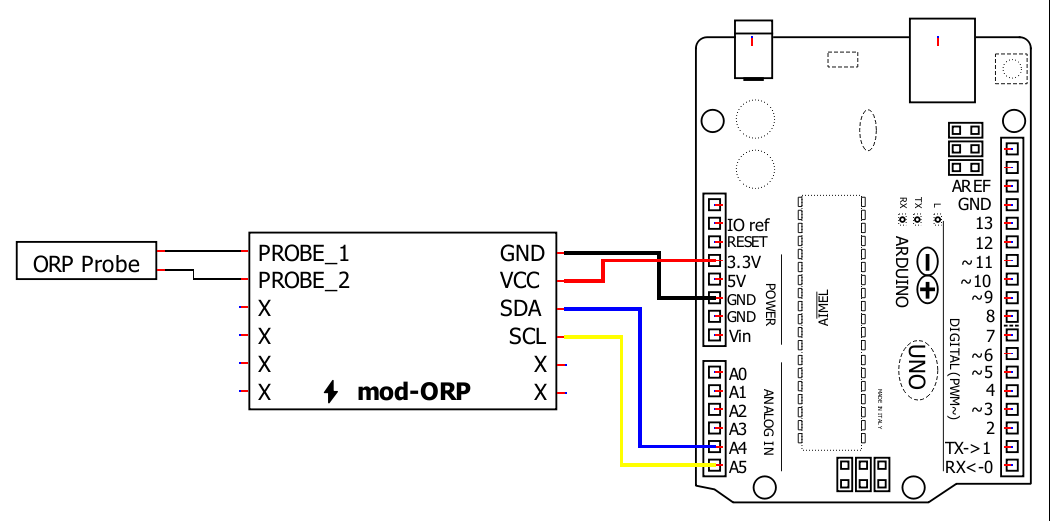
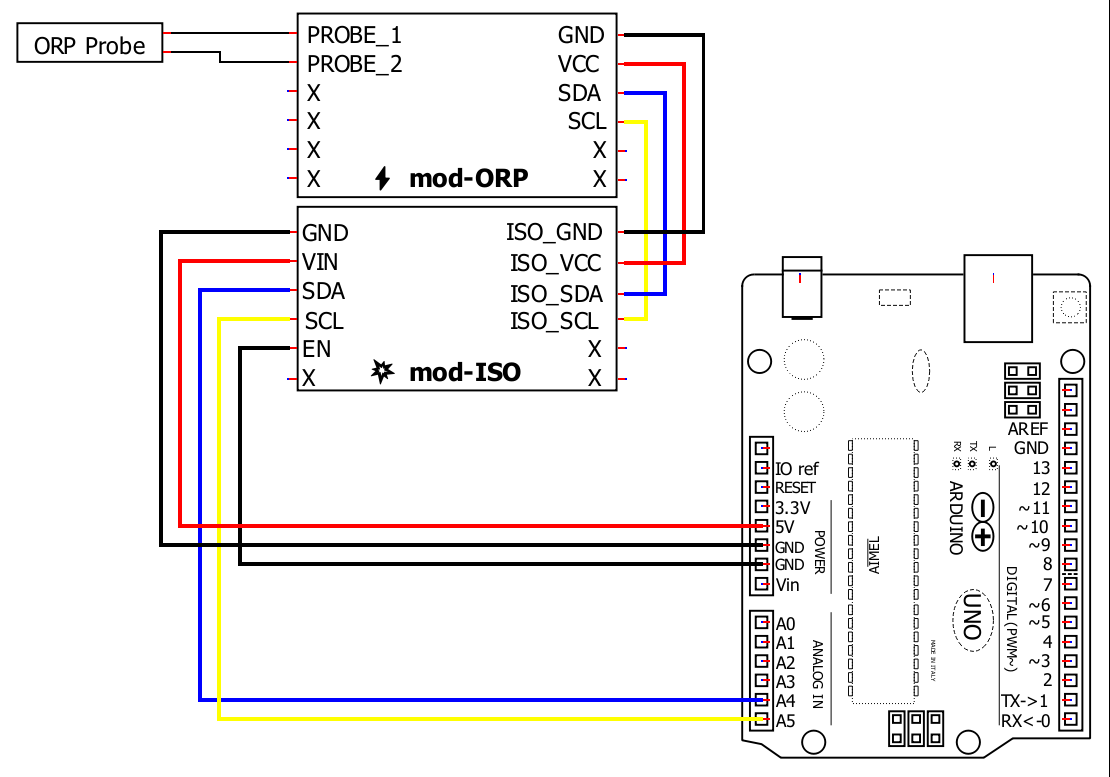
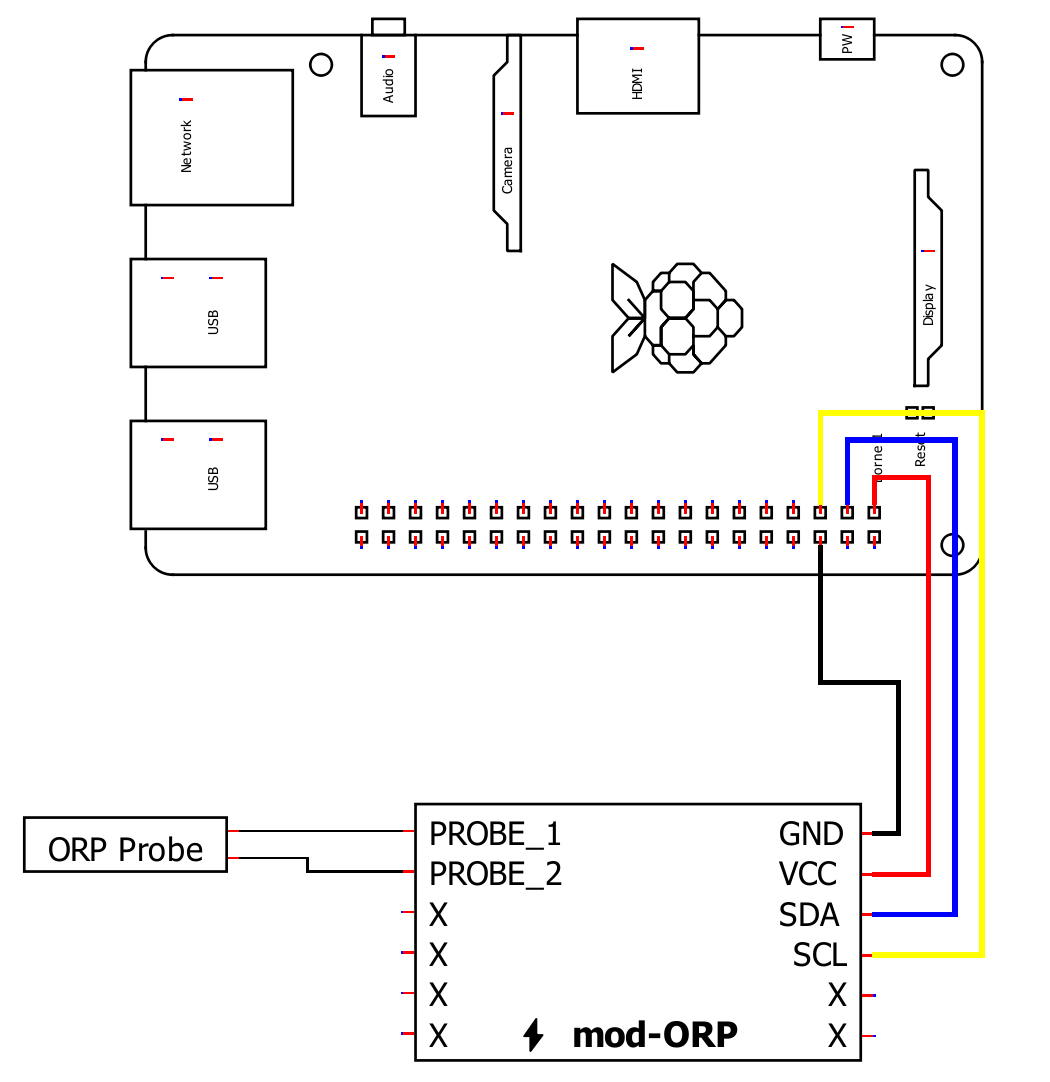
Wiring
1.
📦 Install the library
This Python library can installed through pip in a terminal:
pip3 install Microfire-Mod-ORP
Typing python3 -m Microfire_Mod_ORP.shell will start the shell application and give access to
all features and functions of the module. Type help to see a listing of the commands available.
2.
🔢 Code
Create a python script and run the following sample code.
import Microfire_Mod_ORP
orp = Microfire_Mod_ORP.i2c()
orp.begin()
orp.measureORP()
if orp.status:
  print("Error: " + orp.status_string[orp.status])
else:
  print("{:.2f}".format(orp.mV) + " mV")
3.
Documentation
The library is documented here:


