SHT30
Datasheet
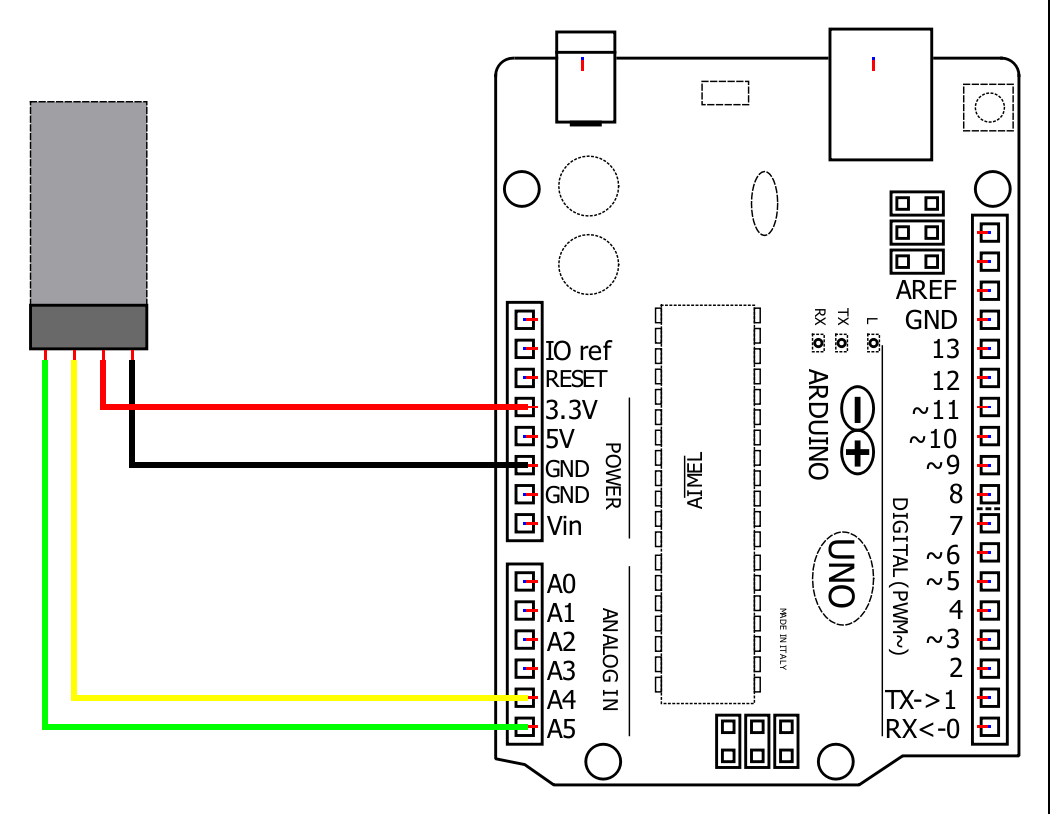
Wiring directly to a host controller
1.
🔽 Install Arduino IDE
Install the Arduino IDE
2.
📦 Install the library
Start the Arduino IDE, press the Sketch menu, and then Include Library > Manage Libraries. Search for Microfire_SHT3x and install the library. There are also lots of other SHT3x libraries, any of them will work if you prefer.
3.
🔢 Code
Below is the Basic example. It can be found in File > Examples > Microfire_Mod-NTC > Basic in the Arduino IDE.
#include "Microfire_SHT3x.h"
Microfire::SHT3x sht30;

void setup() {
  Serial.begin(9600);
  Wire.begin();
  sht30.begin();
}

void loop() {
  sht30.measure();
  Serial.println((String)sht30.tempC + " °C");
  delay(1000);
}
4.
➡️ Upload the code
Pick the board and port, then Upload the code.
5.
🔎 View the output
Open the Serial Monitor, measurements should be displayed in the monitor, with updates every second.
6.
Documentation
The library is documented here:
The SHT3x series of sensors is supported with native ESPHome components. You can read about usage on their website.
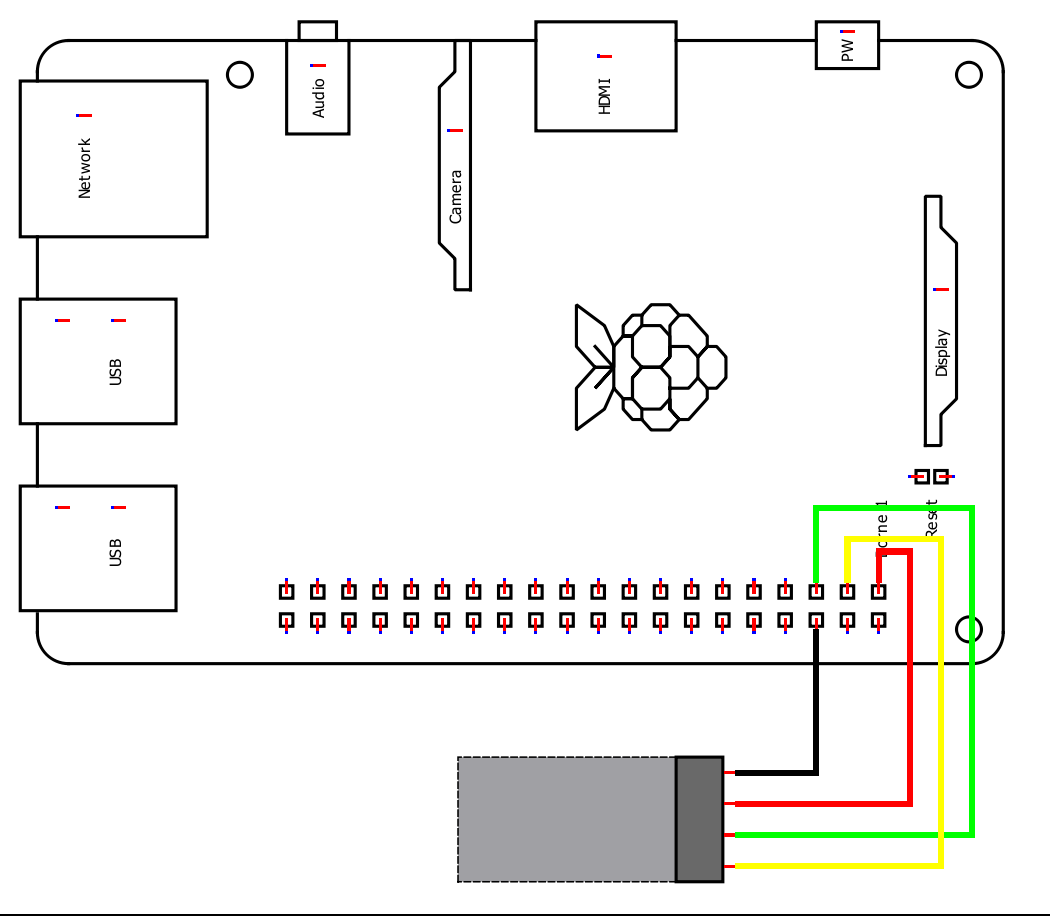
Wiring
1.
📦 Install the library
This Python library can be installed through pip in a terminal:
pip3 install Microfire_SHT3x
Typing python3 -m Microfire_SHT3x.shell will start the shell application and give access to the sensor. Type help to see a listing of the commands available
2.
🔢 Code
Create a python script and run the following sample code.
from Microfire_SHT3x import Microfire_SHT3x
sht30 = Microfire_SHT3x()
sht30.begin()
sht30.measure()
if sht30.status:
  print("Error: " + sht30.status_string[sht30.status])
else:
  print(str("{:.3f}".format(sht30.tempC)) + "°C")
  print(str("{:.3f}".format(sht30.tempF)) + "°F")
  print(str("{:.3f}".format(sht30.vpd_kPa)) + " VPD kPa")
  print(str("{:.3f}".format(sht30.dew_pointC)) + " dew point °C")
  print(str("{:.3f}".format(sht30.dew_pointF)) + " dew point °F")
  print(str("{:.3f}".format(sht30.RH)) + " %RH")
3.
Documentation
The library is documented here: