Mod-NTC for Arduino
1.
🔽 Install Arduino IDE
Install the Arduino IDE2.
📦 Install the library
Start the Arduino IDE, press the Sketch menu, and thenInclude Library > Manage Libraries. Search for Microfire_Mod-NTC and install the library.3.
🔌 Connections
-
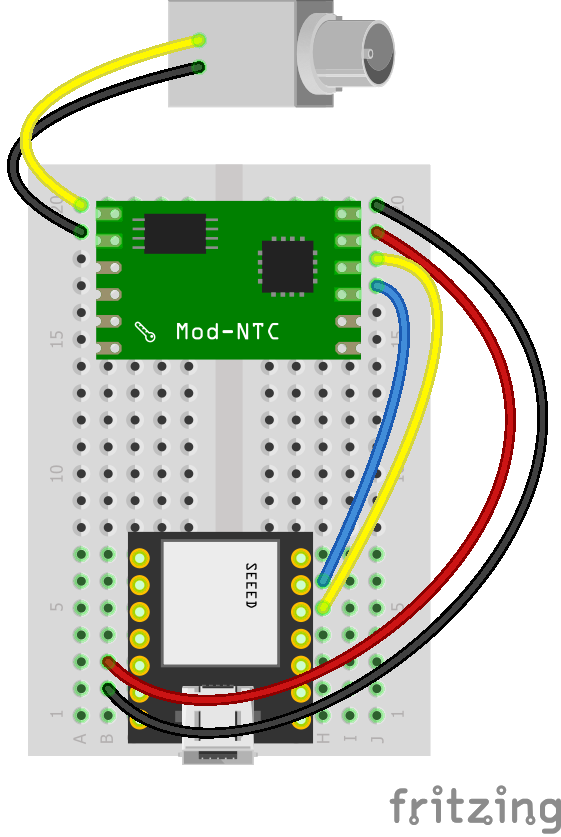 ModuleController
GND ground VCC 3.3 - 5 volt power supply SCL SCL SDA SDA PROBE_1 either probe wire PROBE_2 either probe wire -
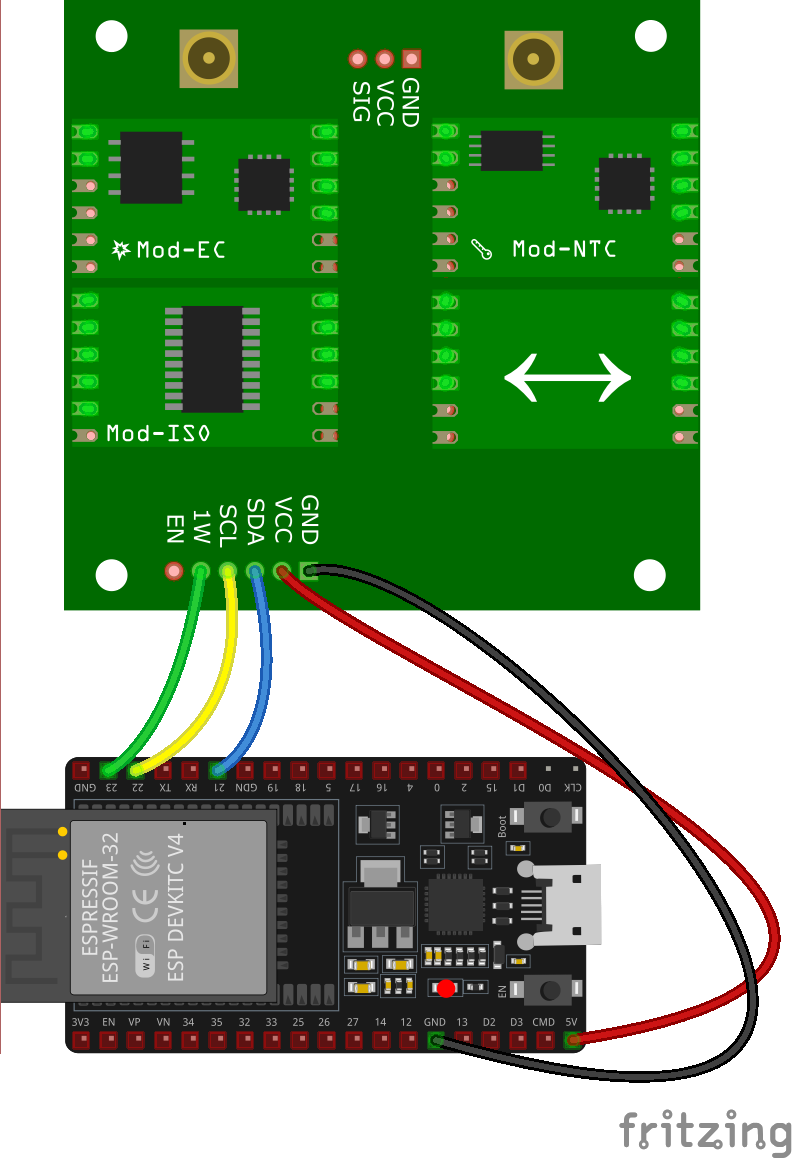 Carrier BoardController
GND ground VIN 3.3 - 5 volt power supply SCL SCL SDA SDA 1W optional 1-wire device signal line EN optional EN wire, drive HIGH to disable both power modules Carrier 1W Header1-Wire SensorGND ground VCC 3.3 - 5 volt power supply SIG signal data line for 1-Wire sensor
Probe connection is made with the SMA connector, using a SMA-BNC Bulkhead or similar.
4.
🔢 Code
1 | |
2 | |
3 | |
4 | |
5 | |
6 | |
7 | |
8 | |
9 | |
10 | |
11 | |
12 | |
13 | |
14 | |
15 | |
5.
➡️ Upload the code
Pick the board and port, then Upload the code.
6.
🔎 View the output
Open the Serial Monitor, measurements should be displayed in the monitor, with updates every
second.